

Tutorial: let another system set stock through an incoming webhook
An Incoming webhook gives a workflow its own secret URL. Another system posts JSON to it, and the workflow runs with that JSON as its event. In this tutorial your ERP or warehouse sends { "sku": "ABC-123", "quantity": 12 }, and the workflow finds the variant and sets its stock. You will use the template that does exactly this, walk through its five steps, and try it from a terminal with curl.
You need: read and write access to products and inventory, and read access to locations, on the Permissions page.
1. Create the workflow
- Open Workflows, select Browse templates and search for
SKU. - Select Use template on Let another system set stock by SKU. The editor opens with the finished workflow.
- Select Save so the workflow gets its URL.
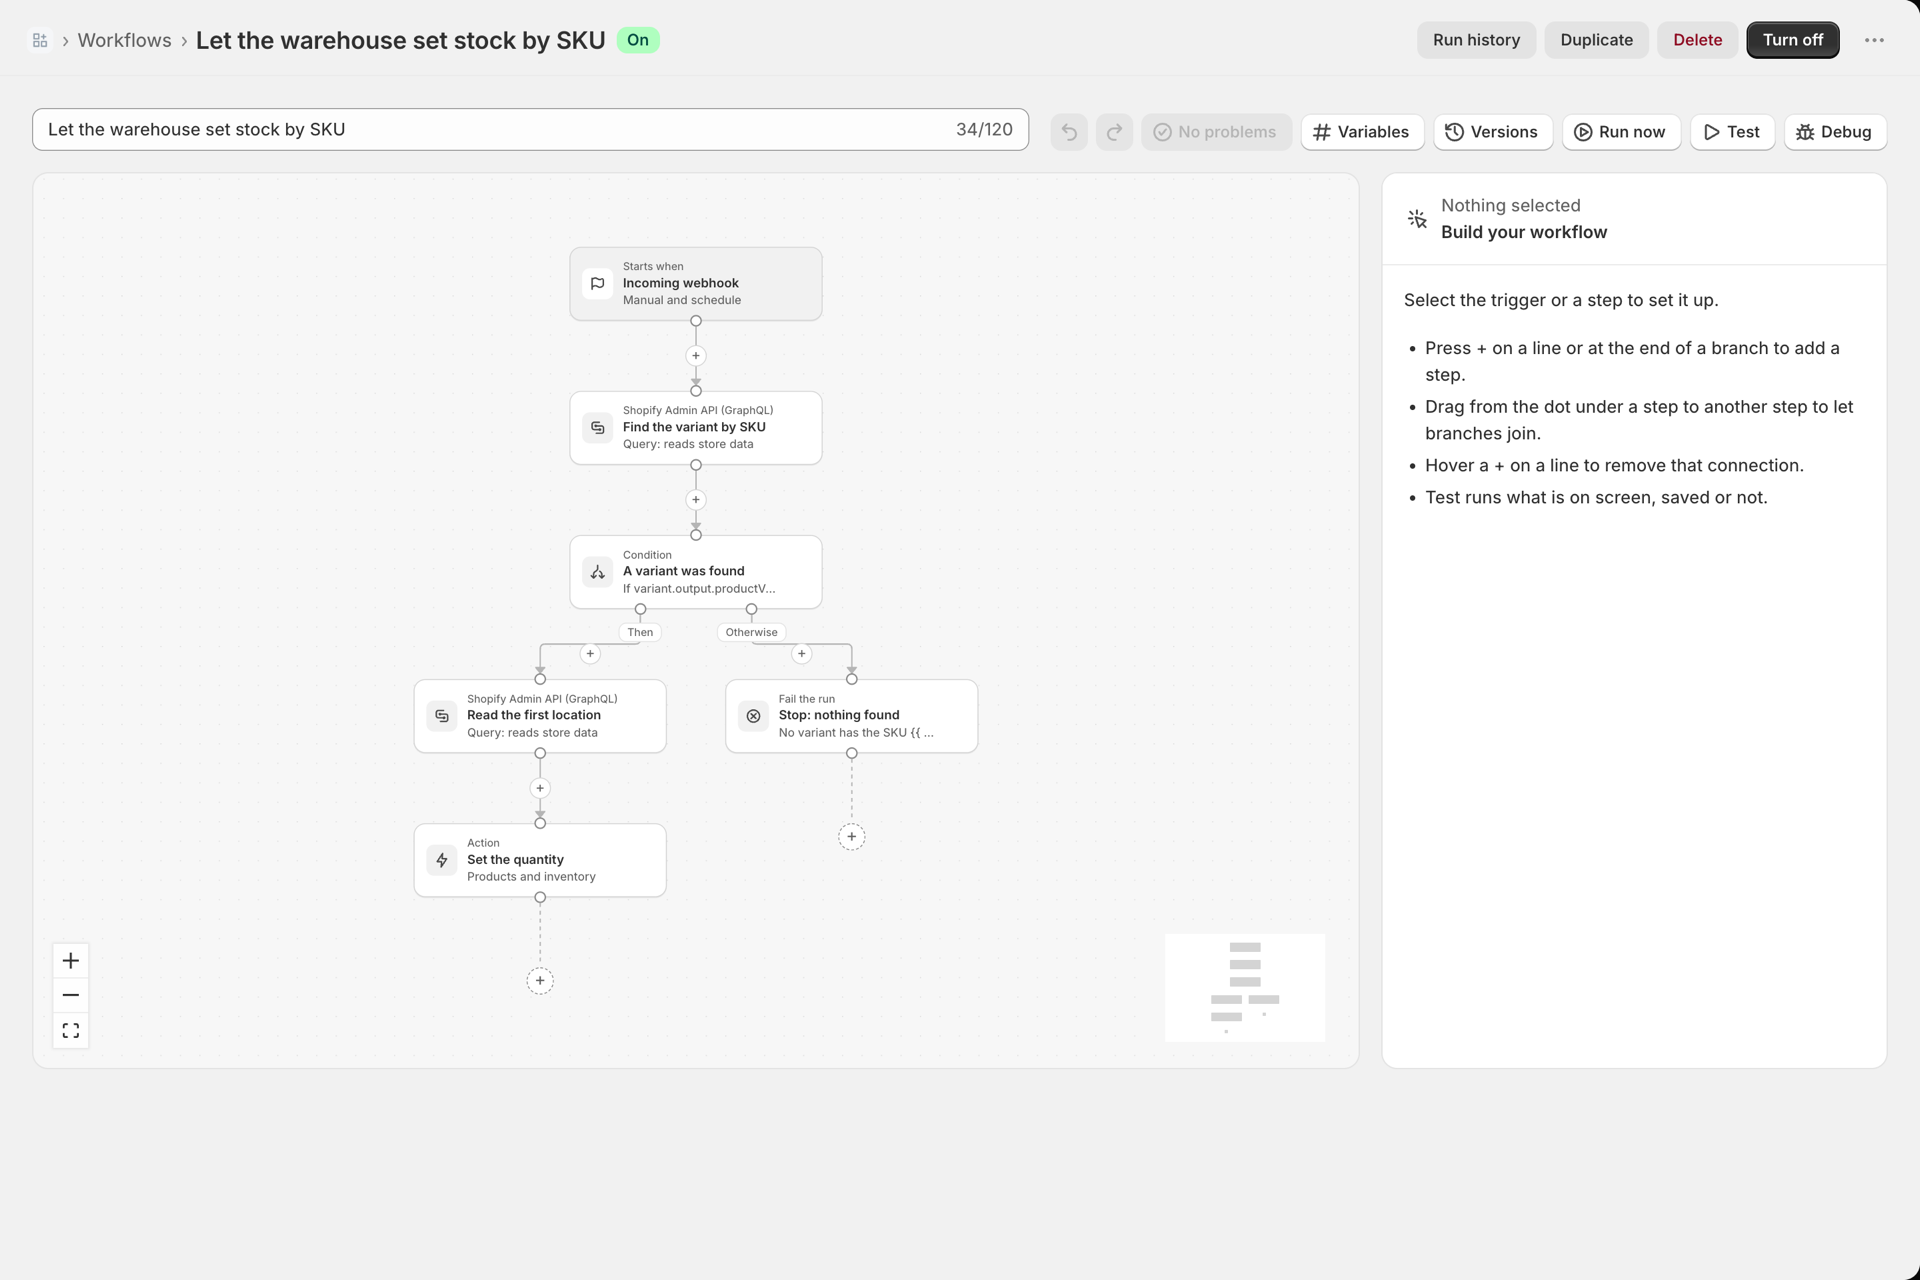
2. Copy the URL and the example request
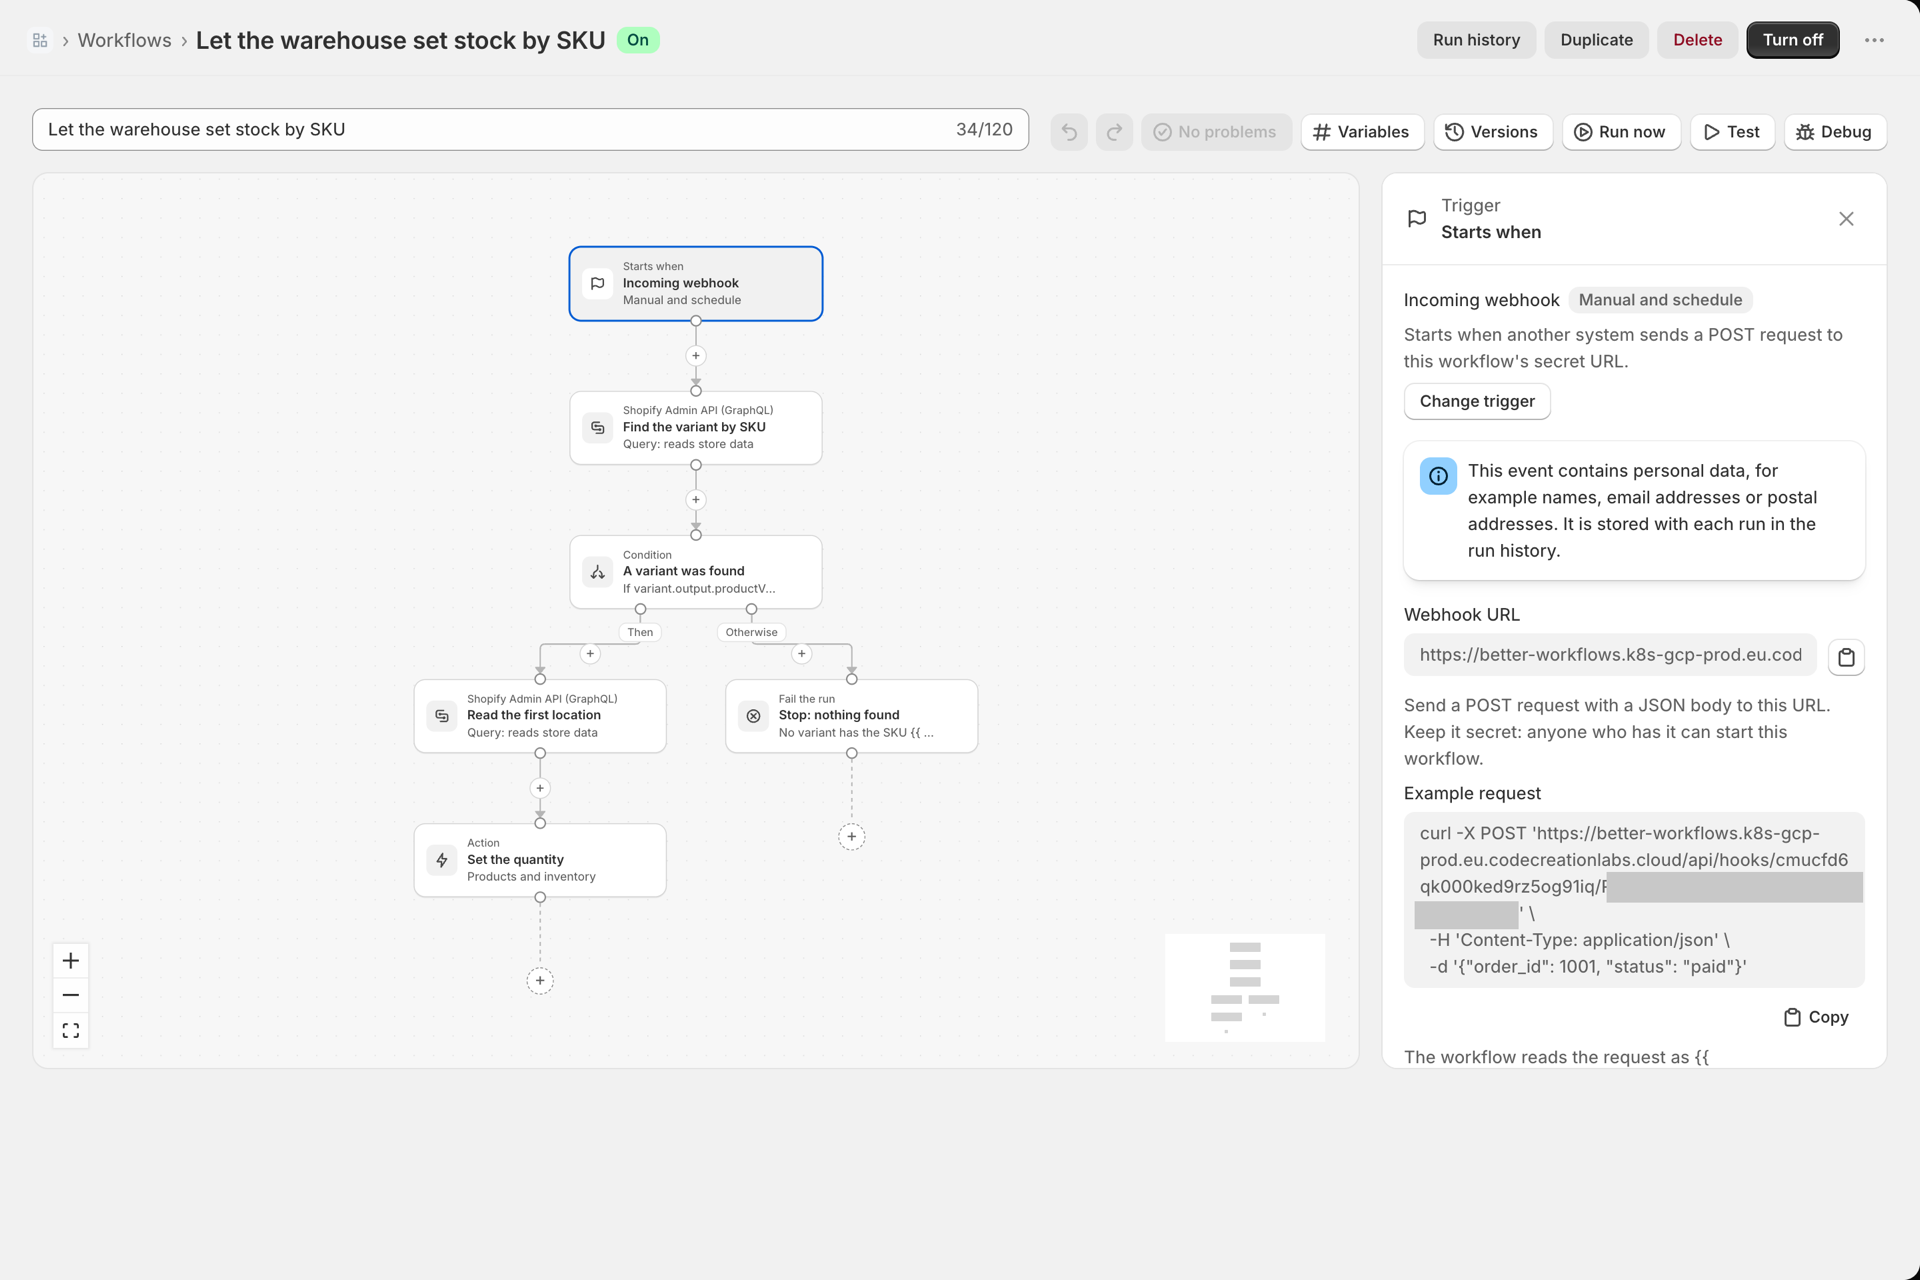
Select the trigger Incoming webhook at the top of the canvas. The side panel shows:
- Webhook URL with a copy button. This is the address the other system posts to.
- Example request: a complete curl command with the URL, the JSON header and a sample body, with its own Copy button.
- A note that the event contains personal data, because whatever the caller sends is stored with the run.
3. How the steps read the request
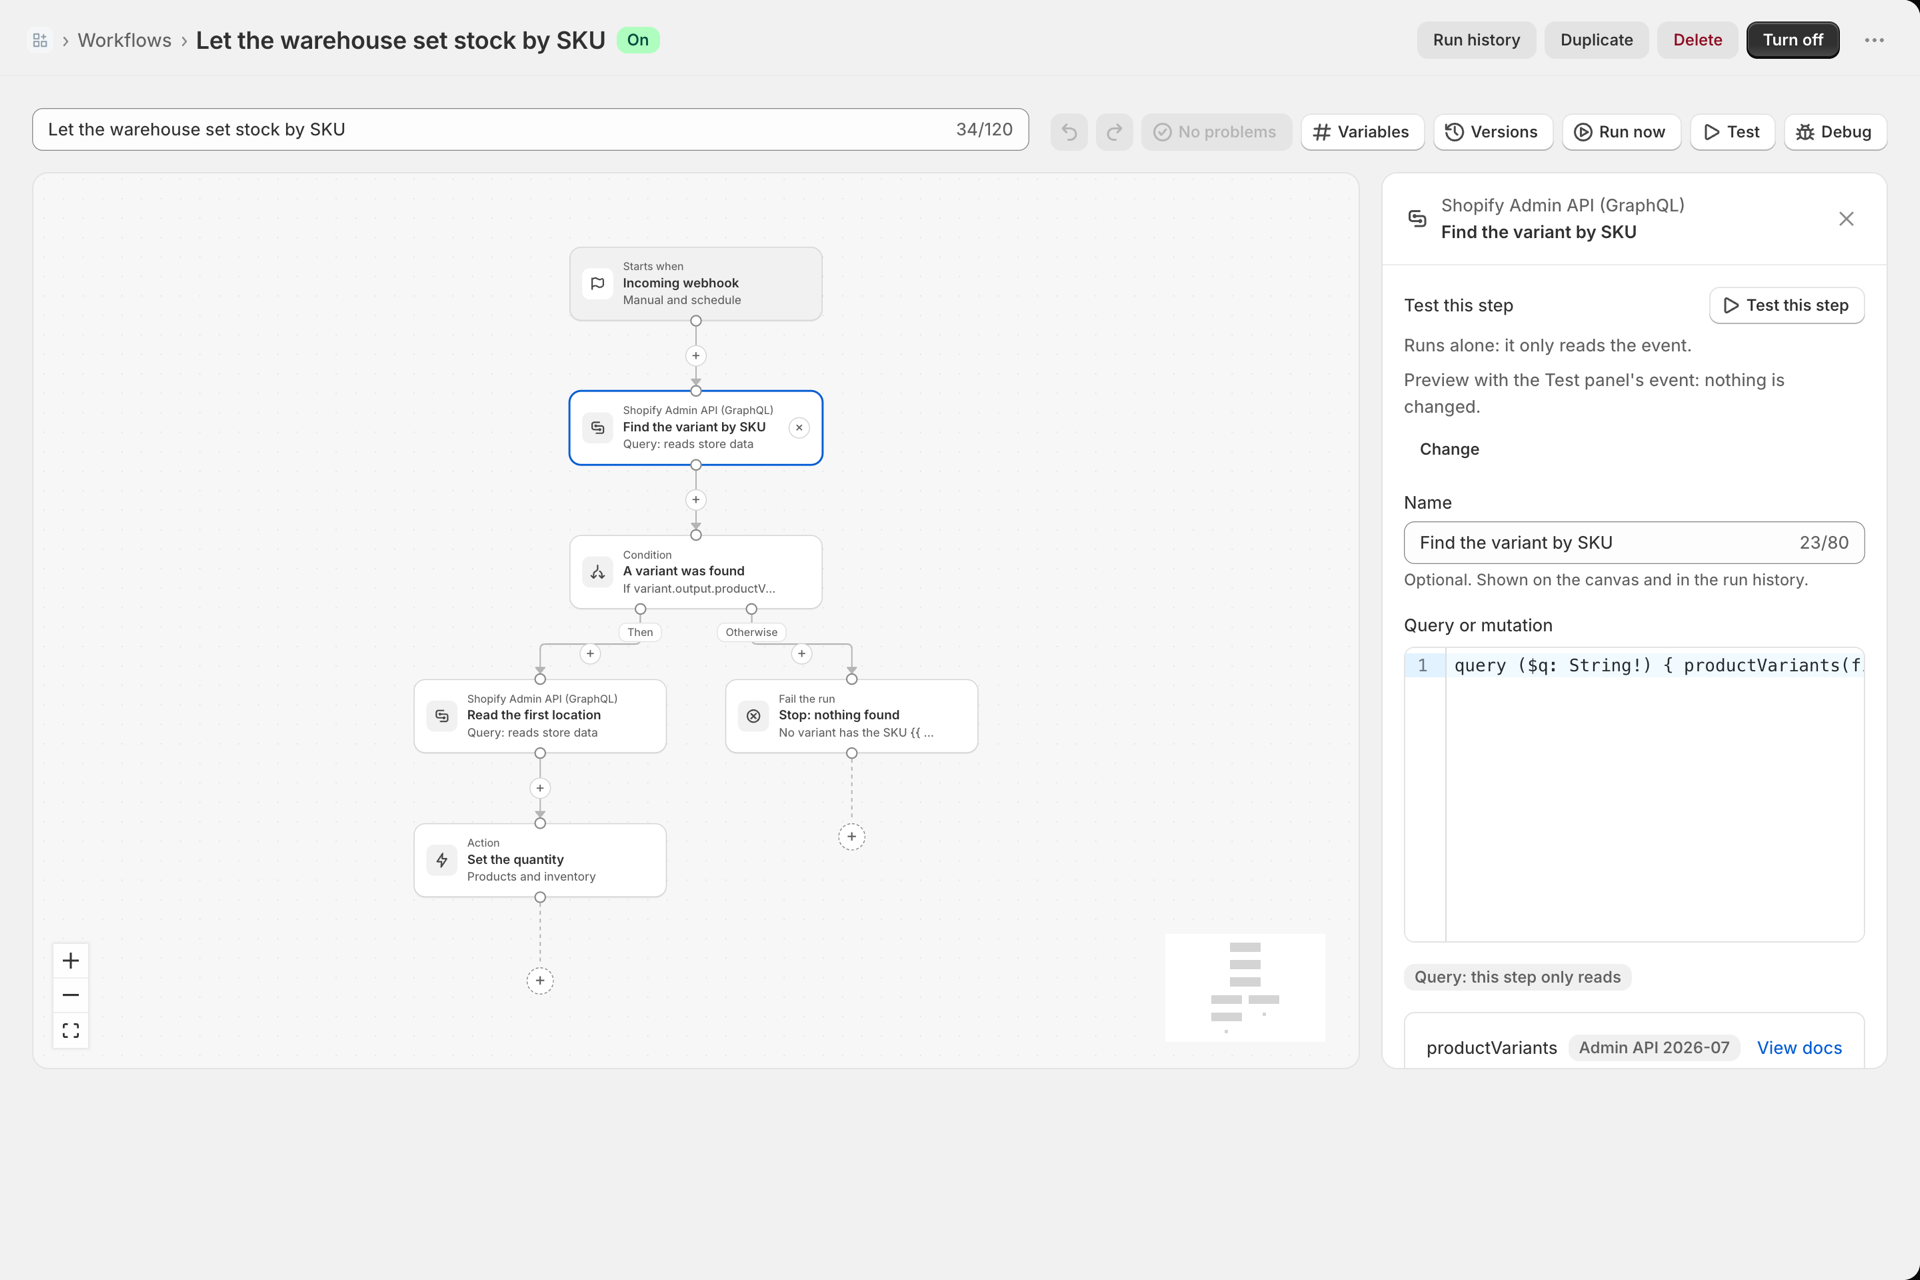
The caller's JSON arrives under event.payload.body, its query string under event.payload.query and its headers under event.payload.headers. Select Find the variant by SKU to see the first step: a Shopify Admin API query that searches variants by SKU. Its Variables (JSON) builds the search from the body:
{ "q": {{ event.payload.body.sku | prepend: "sku:" | json }} }The json filter turns the text into a valid JSON string. Under the query, the docs box shows what the query needs (read_products), a link to Shopify's documentation and its arguments.
Select the condition A variant was found. Its one rule checks that steps.variant.output.productVariants.nodes[0] has a value. If the search found nothing, the run takes the Otherwise branch and ends with Fail the run, whose message names the unknown SKU.
![The Condition side panel of A variant was found: Rule 1 with the field steps.variant.output.productVariants.nodes[0] and the comparison has a value](https://cdn-dev.eu.codecreationlabs.cloud/crm-tool/uploads/SjJ78gKLnLlocopCui3Cs62dJbGZ7F1n/b79fe62a326cdaf7.png)
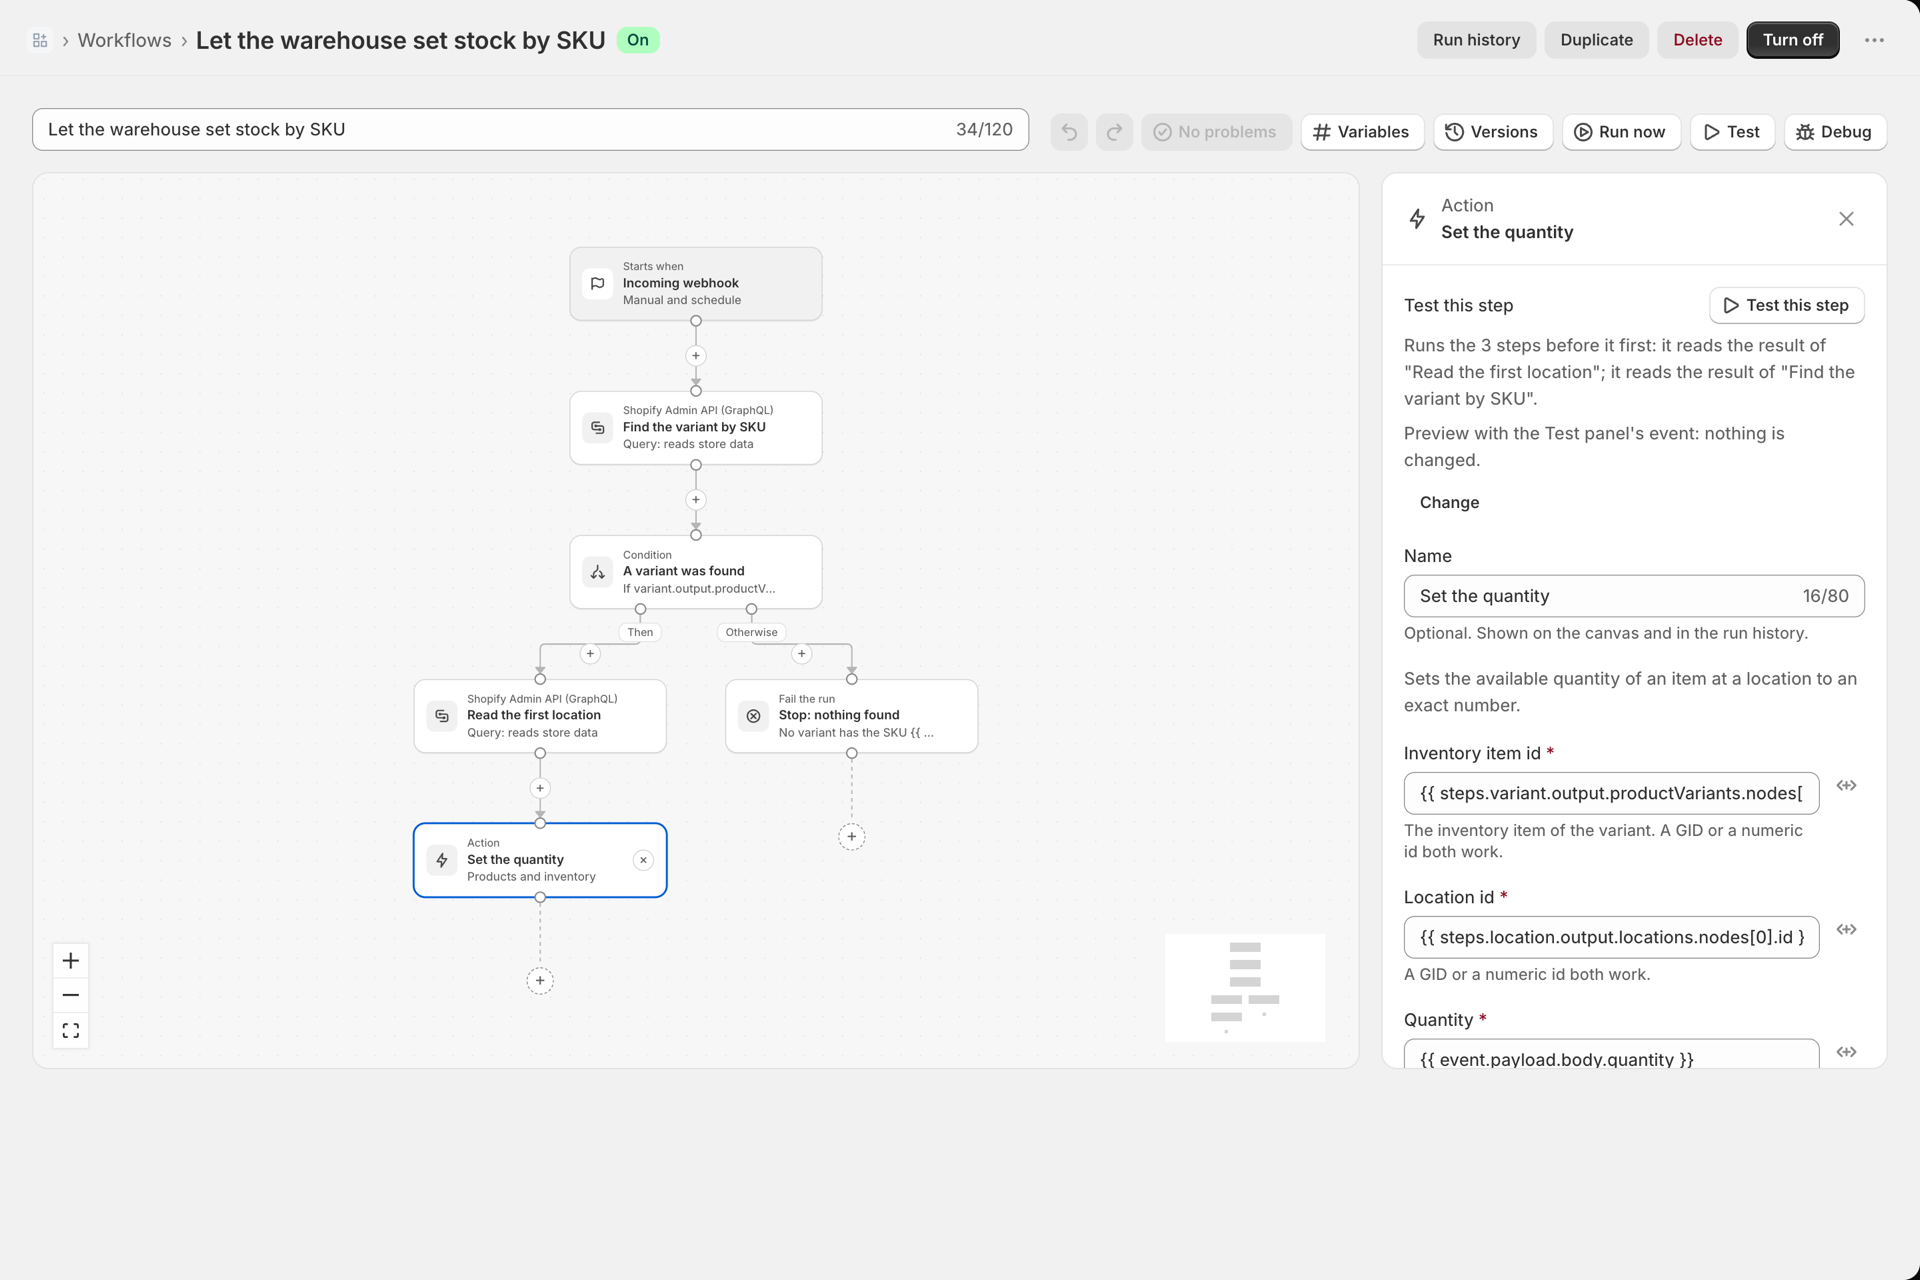
Select Set the quantity, the last step. It is the ready-made action Set inventory quantity: Inventory item id and Location id come from the two queries before it, Quantity is {{ event.payload.body.quantity }}, and Reason is what Shopify shows in the inventory history. Under If it fails the step retries a temporary error automatically.
4. Test it with a real SKU
- Select Test in the toolbar.
- Replace the Event (JSON) with a body that holds a real SKU of your store:
{ "body": { "sku": "ABC-123", "quantity": 12 } }- Keep Preview (nothing is changed) and select Run preview. The two queries and the condition run for real; Set the quantity only reports what it would do. Select it to see the inventory item, the location and the quantity it would have set.
5. Turn it on and call it from a terminal
- Select Turn on. A workflow that is off answers the caller with an error and starts nothing.
- Paste the Example request from the trigger panel into a terminal and change the body:
curl -X POST "<your webhook URL>" \
  -H "Content-Type: application/json" \
-d '{"sku": "ABC-123", "quantity": 12}'- Open Run history. The new run shows the trigger Incoming webhook, each step with its result, and the event the caller sent under Trigger event.
The caller gets an answer as soon as the run is accepted; it does not wait for the steps. Give the other system the URL, and it can set stock whenever it likes.
Make it yours
- Several locations? Delete Read the first location and let the caller send a
location_idin the body, or put a fixed Location id into the last step. - Guard the data. Add a rule to the condition:
event.payload.body.quantityis at least0, so a mistake on the other side cannot empty your stock. - Many SKUs in one request? Send
{ "items": [ ... ] }and wrap the steps in a Repeat for each over{{ event.payload.body.items }}. See Repeat for each. - Everything about the trigger, its answer and its limits: Incoming webhooks.